So today in Alberta it's snowing cats and dogs. And when I say snowing, I mean the sideways snow that gets into everything. E v e r y t h i n g.
SO, on that note of course someone is throwing a dinner party tonight and of course I am making the dessert!
Interesting enough they were asking for one of my recipes, and as soon as I mentioned "Well, I could always bring a pie.." They of course humbly accepted the offer and no longer needed my recipe. :)
On that note, I have had two very delicious sugar pumpkins hanging out in my kitchen for 2 weeks. Pumpkin is no doubt one of the easiest foods to cook.
Now usually I would show you how I baked the pumpkin before turning it into a pie but I will save that tutorial for another time. As it will mean lots of pictures, and I definitely need to bake more pumpkin anyways.
So today I wanted a change of pace. Instead of making a pumpkin pie, I settled on tarts. Why? Because they look pretty, I wanted a change and there is like 10 people going so it's much easier to bring 10 tarts.
I wasn't certain how my pie crust recipe would hold up to a pumpkin pie tart. The only time I have used them as tarts is when I make butter tarts. And they inevitably hold together from all the butter and honey in the filling. But a wet pumpkin pie filling? Not too sure.
Now I L O V E pumpkin pie. It's just barely sweet, spicy and so simple. Oh wait except for the 2 hours of baking time. I loathe the 30min of 425 degrees and the 1 hour of 350 degrees. But among that, I detest the burnt crust around the edge that no matter how many layers upon layers of tinfoil I apply, IT STILL BURNS.
SO. I was thinking a non bake pumpkin pie filling. Of course you can do the pumpkin custard idea and mix the pumpkin puree with mascarpone cheese and dollop it into tarts.
I didn't want to do that of course, mostly because my husband being lactose intolerant it's not fun to substitute things. Plus I didn't feel like hiking in the snow just to go get some goat cheese.
So of course, my idea was to use Gelatin. That's right, animal hooves are in your pumpkin pie! Better than corn syrup, and refined sugar. Gelatin is natural as long as it is organic. If you are opposed to Gelatin, feel free to use Agar Agar powder (not the flakes).
For the "whip cream" topping. Well I usually substitute coconut whip cream and still make the traditional dairy whip cream. Today, I decided to put the hate on all the dairy eaters and just make one cream. Cashew, cream with vanilla and cinnamon.
I figured since everyone can eat it instead of having all the substitutes I just made it simple and made one.
No Bake Pumpkin Pie Filling- Paleo, Grain Free, Sugar Free, Gluten Free, Dairy Free
Yield 1 pie or 18 tarts
2 C Pumpkin Puree (plain no additives or spices)
1/2 C Honey, or agave nectar
2 tsp Real Vanilla Extract
2 tsp Vietnamese Cinnamon
1/2 tsp Dry Ginger
1/2 tsp Nutmeg
1/4 tsp Cloves
1/8 tsp All spice
Place all ingredients in a blender or food processor and puree until smooth.
In a small sauce pan 1 package of Gelatin over 1/2 C goat milk, coconut milk. Let stand 1 minute. Slowly bring the milk up to a simmer over medium heat and stir constantly until the gelatin is dissolved. About 3 minutes. Let cool slightly.
Pour the milk and gelatin into the pumpkin puree and process again until smooth.
Pour into pie or tart crusts and refrigerate for 2-3 hours.
*CAUTION - do not make the filling ahead of time and place in the fridge as it will set in the container and you will have to reheat it to deactivate the Gelatin. If you want to make the filling ahead of time, Omit the milk and gelatin on only add it when ready.
Tart Crusts
I used my double pie crust for the tart crust recipe. I just changed the steps to create tarts.
Prepare the Pie crust dough in a large mixing bowl. Increase the coconut flour up to 1/2 C as needed until dough is sticky and not wet.
Roll the dough out between two piece of parchment paper until 1/4 inch thick. Remove top layer of parchment. Using a 3-4inch circle cutter cut the dough and slowly lift up each circle with a spatula.
Place the circle of dough over a well greased muffin tin. Slowly press the the dough down to the bottom of each muffin cup.
Bake at 400 degrees for 10 minutes. Let cool for 3-5 minutes before moving to a cooling rack.
Whipped Cinnamon Cashew Cream
2 C soaked raw Cashews
1/2 C coconut milk, water, or goat milk
1/2 C melted coconut oil
1/4 C Honey
4 tsp real vanilla extract
4 dashes of cinnamon
Soak the cashews in a bowl, covered with water over night or for 4 hours. Drain and rinse.
Place the soaked cashews in a blender with the milk or water and puree until very smooth. Add more liquid as necessary. (If you are using a food processor or less powerful blender it may take up to 10 minutes of blending to achieve a smooth texture. Otherwise, strain the cashew puree through a fine mesh sieve before continuing).
Add vanilla, honey, cinnamon, and puree. While blender is running, pour in the melted coconut oil in a steady stream until emulsified. If you have trouble getting the cashew cream to thicken, add coconut flour 1-2 tbs.
Refrigerate until firm and set. 1-3 hours.
My trip towards my new Grain Free Lifestyle. I was completely blown away and convinced after reading "Wheat Belly". My husband, and my parents are now following the new lifestyle changes. Follow me and see that life is still fabulously delicious after living without.
Showing posts with label Primal. Show all posts
Sunday, October 27, 2013
Thursday, January 17, 2013
Cashew Frosting, Dairy Free, Gluten Free, Grain Free, Sugar Free, Paleo
I think my favorite thing above all to make is cupcakes. Not because I have books and books on different kinds, and they are super simple. You could bring cupcakes to every event you go to for 10 years and never bring the same kind!
I am going to a Birthday this weekend, and I of course am bringing the cake!!! Not just because I love cake, and it's fun to make, but because then I can eat it and so can everyone else without even knowing the difference.
I get stupid disappointed when I go somewhere and the gorgeous chocolate cake is made from crappy GMO wheat flour.. bleh.. What the hell!? Didn't anyone know I would be there and expect that I could eat the cake?
Since are lifestyle has changed I have been using such different ingredients all the time it has opened my eyes broadly towards alternative ingredients.
Like who says butter cream has to be made from dairy butter? Or who says you need milk for the base? Why cornstarch?
You know a lot of people still don't know that icing sugar is paired with cornstarch in the bag? I think one of the funniest moments in my life is when I found out that brown sugar is still WHITE cane sugar, it's just smothered in molasses. Molasses is just a sugary residue leftover from manufacturing sugar! Sugar on top of sugar, HA who would have thunk?
Not that I have anything against sugar, I just never knew. It's not like I went out of my way to discover it. I mean if you already have white sugar why make it brown? Why make cheese orange?!?!? Why does Coca-Cola need caramel color!?!? Oh so many questions...
SO, anyways, when I heard told that a chocolate cake with a vanilla topping was so called desired, I was so excited!!
Chocolate cake, easy peasy. Vanilla, bah so many options. THEN I got the "dairy free" notice. Okay, no biggie. I know how to do it, but I have never actually done it, probably because I have just not had the desire to all of a sudden make dairy free frosting. I decided to go with a vegan chocolate cake (just to help eliminate any allergens) and it turned out quite nice and fudgy.
The only dairy free frosting I make often is coconut whip (which is delicious on waffles btw). Today I didn't want to make coconut whip, I wanted to go for it, and dive in to a dairy free frosting.
You could call this primal, or paleo because there is no corn starch or sugar. If you don't like coconut milk, you can sub in almond, or cashew without a doubt.
I don't mind coconut, and I must say I don't even notice the coconut in the frosting.
If you don't like cashews, you could use.. macadamia nuts, or walnuts, or pecans. Doesn't matter really, I LOVE cashews, as a nut, as a waffle, and as a piece of bread.
They are buttery and soft and have no distinct flavor.
I think the best part of this frosting is it looks like regular frosting. Not chunky and nutty, it's not like you look at and just know there is something "different" then icing sugar and butter whipped together. You wouldn't know. In fact, there is one lonely cupcake sitting in my counter right now, just waiting for hubby. Do you think he knows? Not a chance. Will he hate it, nope. Do you know how I know? Because he loves me so much that even if it's awful he'll shovel it in. So if this frosting sucks, I wouldn't know. Besides the delicioustwo I ate, I will just have to wait until Saturday to find out how gross they are.
If you have a mediocre food processor, you may end up with a chunkier textured frosting. Don't fret, it will still taste the same, just not look as fantastic as mine. I had to run my fantastic Kitchen-aid for a couple minutes to get it the texture I wanted.
Cashew Creme Frosting - Dairy free, Gluten Free, Grain Free, Sugar Free, Primal, Paleo
In a Food Processor:
1 C raw whole cashews
(sub macadamia, walnut, almonds, etc)
1/2 C raw chopped blanched almonds
1/4 C raw agave nectar, honey, maple syrup, coconut sap
1/4 C Full Fat Coconut Milk, Cashew milk, almond milk etc.
Puree. Scrape down sides.
Add to processor while spinning:
1/4 C plus 1 T Full fat Coconut Milk, cashew milk, almond milk etc.
1/4 C plus 2 T melted organic coconut oil or clarified butter
1 T real vanilla extract
pinch sea salt
Puree 1-3 minutes scraping down sides until smooth and creamy.
For a "cream cheese" taste add 1-2 t lemon juice
Once you are happy with the texture, place covered in the refrigerator for 30min to 1 hour. Stir the frosting before use to check for the consistency. If the frosting is too stiff, let sit at room temperature until spreadable.
I took mind directly out of the fridge and placed it in my icing bag and frosted my cupcakes immediately. I then places the cupcakes back in the fridge for safe keeping.
Because there is no starch used in this recipe if the frosting gets warmer then room temperature it will start to melt or run. So best to keep them chilled until eating.
I topped my cupcakes with "sprinkles". I don't actually buy sprinkles anymore, as they are corn syrup, high fructose and colors. I get my colored or flavored sugars from an organic spice dealer.
(I have placed my favorite places to shop in my side bar). Organic sugar, is not processed or bleached and not nearly as bad for you. It is still very high in my Glycemic index which is why it should be eaten in moderation. I also really enjopy how their sugar is flavored with natural sources, cocoa powder, lemon, strawberry, vanilla etc. I have never received a headache from a pinch of flavored sugar on my cupcakes, so I go ahead and indulge.
I like pretending I can eat amazing sugar high cupcakes just like everyone else, except I don't :)
I am going to a Birthday this weekend, and I of course am bringing the cake!!! Not just because I love cake, and it's fun to make, but because then I can eat it and so can everyone else without even knowing the difference.
I get stupid disappointed when I go somewhere and the gorgeous chocolate cake is made from crappy GMO wheat flour.. bleh.. What the hell!? Didn't anyone know I would be there and expect that I could eat the cake?
Since are lifestyle has changed I have been using such different ingredients all the time it has opened my eyes broadly towards alternative ingredients.
Like who says butter cream has to be made from dairy butter? Or who says you need milk for the base? Why cornstarch?
You know a lot of people still don't know that icing sugar is paired with cornstarch in the bag? I think one of the funniest moments in my life is when I found out that brown sugar is still WHITE cane sugar, it's just smothered in molasses. Molasses is just a sugary residue leftover from manufacturing sugar! Sugar on top of sugar, HA who would have thunk?
Not that I have anything against sugar, I just never knew. It's not like I went out of my way to discover it. I mean if you already have white sugar why make it brown? Why make cheese orange?!?!? Why does Coca-Cola need caramel color!?!? Oh so many questions...
SO, anyways, when I heard told that a chocolate cake with a vanilla topping was so called desired, I was so excited!!
Chocolate cake, easy peasy. Vanilla, bah so many options. THEN I got the "dairy free" notice. Okay, no biggie. I know how to do it, but I have never actually done it, probably because I have just not had the desire to all of a sudden make dairy free frosting. I decided to go with a vegan chocolate cake (just to help eliminate any allergens) and it turned out quite nice and fudgy.
The only dairy free frosting I make often is coconut whip (which is delicious on waffles btw). Today I didn't want to make coconut whip, I wanted to go for it, and dive in to a dairy free frosting.
You could call this primal, or paleo because there is no corn starch or sugar. If you don't like coconut milk, you can sub in almond, or cashew without a doubt.
I don't mind coconut, and I must say I don't even notice the coconut in the frosting.
If you don't like cashews, you could use.. macadamia nuts, or walnuts, or pecans. Doesn't matter really, I LOVE cashews, as a nut, as a waffle, and as a piece of bread.
They are buttery and soft and have no distinct flavor.
I think the best part of this frosting is it looks like regular frosting. Not chunky and nutty, it's not like you look at and just know there is something "different" then icing sugar and butter whipped together. You wouldn't know. In fact, there is one lonely cupcake sitting in my counter right now, just waiting for hubby. Do you think he knows? Not a chance. Will he hate it, nope. Do you know how I know? Because he loves me so much that even if it's awful he'll shovel it in. So if this frosting sucks, I wouldn't know. Besides the delicious
If you have a mediocre food processor, you may end up with a chunkier textured frosting. Don't fret, it will still taste the same, just not look as fantastic as mine. I had to run my fantastic Kitchen-aid for a couple minutes to get it the texture I wanted.
Cashew Creme Frosting - Dairy free, Gluten Free, Grain Free, Sugar Free, Primal, Paleo
In a Food Processor:
1 C raw whole cashews
(sub macadamia, walnut, almonds, etc)
1/2 C raw chopped blanched almonds
1/4 C raw agave nectar, honey, maple syrup, coconut sap
1/4 C Full Fat Coconut Milk, Cashew milk, almond milk etc.
Puree. Scrape down sides.
Add to processor while spinning:
1/4 C plus 1 T Full fat Coconut Milk, cashew milk, almond milk etc.
1/4 C plus 2 T melted organic coconut oil or clarified butter
1 T real vanilla extract
pinch sea salt
Puree 1-3 minutes scraping down sides until smooth and creamy.
For a "cream cheese" taste add 1-2 t lemon juice
Once you are happy with the texture, place covered in the refrigerator for 30min to 1 hour. Stir the frosting before use to check for the consistency. If the frosting is too stiff, let sit at room temperature until spreadable.
I took mind directly out of the fridge and placed it in my icing bag and frosted my cupcakes immediately. I then places the cupcakes back in the fridge for safe keeping.
Because there is no starch used in this recipe if the frosting gets warmer then room temperature it will start to melt or run. So best to keep them chilled until eating.
I topped my cupcakes with "sprinkles". I don't actually buy sprinkles anymore, as they are corn syrup, high fructose and colors. I get my colored or flavored sugars from an organic spice dealer.
(I have placed my favorite places to shop in my side bar). Organic sugar, is not processed or bleached and not nearly as bad for you. It is still very high in my Glycemic index which is why it should be eaten in moderation. I also really enjopy how their sugar is flavored with natural sources, cocoa powder, lemon, strawberry, vanilla etc. I have never received a headache from a pinch of flavored sugar on my cupcakes, so I go ahead and indulge.
I like pretending I can eat amazing sugar high cupcakes just like everyone else, except I don't :)
Thursday, January 10, 2013
Grain Free French Bread Baguette - Gluten Free, Dairy Free*, Primal
I have some UBER exciting news!!!! A friend of mine is featuring a recipe of mine directly on her site! I am so excited to share it with you, as I worked hard to come up with the recipe just for them.
Get the recipe for Grain Free French Bread "Baguette" here!!
And, of course, if you ever want me to write a recipe for you.. Ya know where to find me;)
Get the recipe for Grain Free French Bread "Baguette" here!!
And, of course, if you ever want me to write a recipe for you.. Ya know where to find me;)
Friday, January 4, 2013
Banana "Cream" Pudding - Gluten Free, Grain Free, Sugar Free
Yes it's me! I did survive the Holidays!
I had originally planned to add some great holiday recipes to the list, but then I got distracted, got behind with orders, got behind in making gifts, got behind in making baking, and just really got behind.. sigh.
So I decided to save myself the stress and not worry about it. It also greatly helped me to chuck the delicious food in the freezer to save me from myself and indulging.
SOOOO.. here I was today, wanting something new, fresh, chilled and easy. I ran through a bunch of my favorite books and got some ideas and then I landed upon a page dear to my heart. Banana Cream Pie, oh how I love thee:)
Well, I didn't feel like making a crust, or going fancy with the gelatin and so I thought how delicious would it be to have the scrumptious banana cream all on it's own?
I discovered that it's called Banana Pudding on Google lol. But I didn't want to use starch or flour.
The traditional Banana Cream Pie (before the days of processed Cool Whip and JELLO Instant Pudding Powder), Was a classic custard made with flour egg yolks and sugar. You of course can find a ton of Gluten Free Banana Cream filling recipes. You can also find Primal ones with almond butter that bake into a gooey center.
I just picked a couple different recipes out of my books (as I usually do) and I figured that I would either end up with a pudding or a cold soup. Either way, I would eat it and learn.
This delicious pudding is made from bananas with only a splash of agave to help thicken and Coconut Butter as the primary thickening agent. I did use egg yolks, but unless you use a lot more of them and stir in the classic half a cup of flour, it's hard to get a thick pudding.
I used three bananas for the filling that were prviously frozen, that I just thawed and mashed. You will get a great result using fresh bananas as long as they are black and ripe. If not I would suggest using a sweetener to taste. I loved the rustic texture of my hand stirred pudding, if you want it to be whipped and smooth, throw it in a food processor before refrigerating. You can use this pudding as a banana cream pie filling. Pre bake your crust or use a no bake (such as in my cheesecake recipe) and chill the pudding. Once chilled, place in the pie shell and freeze. Just top with Coconut Whip cream and slice.
I found this pudding to be stupid good, like soo good on my way down the stairs to go order more bananas I had to refill my bowl. It's like a banana cream pie without the pie or a banana bread without the bread, or a banana pancake without the pancake. Pile on those walnuts and chow down on this delicious chilly goodness.
You could make it fancy and throw in some chocolate chips!
MMMMMmmmmmm.
Banana Cream Pudding - Gluten Free, Grain free, Sugar Free
This is for my mom who tried to make banana cream pie with an avocado :)
Topping:
Place in a small glass bowl:
1 sliced banana
2 t lime juice
Place in refrigerator.
Pudding:
In a saucepan over medium heat:
1.5 C Organic milk, cashew milk or coconut milk
2 organic egg yolks
2 t real vanilla extract
pinch of sea salt
Stir constantly until bubbly and starting to thicken.
Pour in 3 T warm and soft coconut butter**
Whisk continuously until pudding is thick and no coconut butter remains. Pour into a glass bowl on the side.
In the same sauce pan over medium heat:
3 mashed bananas
3 dashes of cinnamon
2 T butter or coconut oil
splash of real vanilla extract
Stir and cook for 3-4 minutes until banana is browned and heated through. Add the bananas to the custard and mix well together. For a smooth texture puree in a processor. For a chunky texture mix by hand.
Cover with plastic wrap. Place the plastic wrap all the way down into the bowl so it covers and sits on top of the top of the pudding. This will prevent a skin from forming.
Chill in the refrigerator for an hour or more until gelatinous.
Scoop into a bowl and place three chilled sliced bananas with lime juice on top, and sprinkle with chopped raw walnuts.
Though the coconut butter was used I didn't taste in in the recipe so don't be afraid.
Delicious!!!!
** The coconut butter is used to thicken the pudding. If you don't have coconut butter, you could use cashew or almond butter. Using a nut butter though may change the taste and make it nutty. Otherwise you can sub in coconut flour or corn starch by the teaspoon until it's thick to your satisfaction. **
Using coconut butter to thicken is a great way without using starch or flour. It can be deceiving though as it will not start to show exactly how thick it is until the pudding cools. You will see an immediate thicken but it will become a pudding texture until after chilling versus a soup texture while it's hot.
If you use too much coconut butter you may end up with an ice cream texture you could eat frozen. yum!
I had originally planned to add some great holiday recipes to the list, but then I got distracted, got behind with orders, got behind in making gifts, got behind in making baking, and just really got behind.. sigh.
So I decided to save myself the stress and not worry about it. It also greatly helped me to chuck the delicious food in the freezer to save me from myself and indulging.
SOOOO.. here I was today, wanting something new, fresh, chilled and easy. I ran through a bunch of my favorite books and got some ideas and then I landed upon a page dear to my heart. Banana Cream Pie, oh how I love thee:)
Well, I didn't feel like making a crust, or going fancy with the gelatin and so I thought how delicious would it be to have the scrumptious banana cream all on it's own?
I discovered that it's called Banana Pudding on Google lol. But I didn't want to use starch or flour.
The traditional Banana Cream Pie (before the days of processed Cool Whip and JELLO Instant Pudding Powder), Was a classic custard made with flour egg yolks and sugar. You of course can find a ton of Gluten Free Banana Cream filling recipes. You can also find Primal ones with almond butter that bake into a gooey center.
I just picked a couple different recipes out of my books (as I usually do) and I figured that I would either end up with a pudding or a cold soup. Either way, I would eat it and learn.
This delicious pudding is made from bananas with only a splash of agave to help thicken and Coconut Butter as the primary thickening agent. I did use egg yolks, but unless you use a lot more of them and stir in the classic half a cup of flour, it's hard to get a thick pudding.
I used three bananas for the filling that were prviously frozen, that I just thawed and mashed. You will get a great result using fresh bananas as long as they are black and ripe. If not I would suggest using a sweetener to taste. I loved the rustic texture of my hand stirred pudding, if you want it to be whipped and smooth, throw it in a food processor before refrigerating. You can use this pudding as a banana cream pie filling. Pre bake your crust or use a no bake (such as in my cheesecake recipe) and chill the pudding. Once chilled, place in the pie shell and freeze. Just top with Coconut Whip cream and slice.
I found this pudding to be stupid good, like soo good on my way down the stairs to go order more bananas I had to refill my bowl. It's like a banana cream pie without the pie or a banana bread without the bread, or a banana pancake without the pancake. Pile on those walnuts and chow down on this delicious chilly goodness.
You could make it fancy and throw in some chocolate chips!
MMMMMmmmmmm.
Banana Cream Pudding - Gluten Free, Grain free, Sugar Free
This is for my mom who tried to make banana cream pie with an avocado :)
Topping:
Place in a small glass bowl:
1 sliced banana
2 t lime juice
Place in refrigerator.
Pudding:
In a saucepan over medium heat:
1.5 C Organic milk, cashew milk or coconut milk
2 organic egg yolks
2 t real vanilla extract
pinch of sea salt
Stir constantly until bubbly and starting to thicken.
Pour in 3 T warm and soft coconut butter**
Whisk continuously until pudding is thick and no coconut butter remains. Pour into a glass bowl on the side.
In the same sauce pan over medium heat:
3 mashed bananas
3 dashes of cinnamon
2 T butter or coconut oil
splash of real vanilla extract
Stir and cook for 3-4 minutes until banana is browned and heated through. Add the bananas to the custard and mix well together. For a smooth texture puree in a processor. For a chunky texture mix by hand.
Cover with plastic wrap. Place the plastic wrap all the way down into the bowl so it covers and sits on top of the top of the pudding. This will prevent a skin from forming.
Chill in the refrigerator for an hour or more until gelatinous.
Scoop into a bowl and place three chilled sliced bananas with lime juice on top, and sprinkle with chopped raw walnuts.
Though the coconut butter was used I didn't taste in in the recipe so don't be afraid.
Delicious!!!!
** The coconut butter is used to thicken the pudding. If you don't have coconut butter, you could use cashew or almond butter. Using a nut butter though may change the taste and make it nutty. Otherwise you can sub in coconut flour or corn starch by the teaspoon until it's thick to your satisfaction. **
Using coconut butter to thicken is a great way without using starch or flour. It can be deceiving though as it will not start to show exactly how thick it is until the pudding cools. You will see an immediate thicken but it will become a pudding texture until after chilling versus a soup texture while it's hot.
If you use too much coconut butter you may end up with an ice cream texture you could eat frozen. yum!
Monday, November 5, 2012
Savory Quiche - Grain free, Gluten Free
On the weekend, I am always in the mood for something a little more extravagant then a fried egg and a glass of milk.
However, Kyle always wants eggs, and bacon :) Usually I will stick to waffles or pancakes (using both my whey powder recipes). However on Sunday, I wasn't in the mood for carbs.
I woke up a bit early so I had some extra time. I was having some fond memories of a hot warm quiche coming out of the oven as I sipped on my coffee and watched the snow pile up on the windows. Mmmm quiche. You know those little mini tarts that are served at parties? Besides those parties and Home Economics, I never really made them.
I was excited to try something new without adding a full carb load onto my day.
I wasn't sure exactly what crust I was wanting to try. traditionally a wheat pie crust would be used, or a store bought frozen tart shell.
I was thinking about how I didn't really feel like making my FABULOUS pie crust this early am. So I went with a herb almond flour crust.
This crust was very flavorful and delicious. The only downfall I could say is it doesn't hold together as well hot fresh out of the oven versus when it's cooled down or eaten cold.
You can cut it and it holds together, don't get me wrong, but it does crumble.
I think this recipe turned out delicious, but it did take longer then the average breakfast. To pick up the pace I would recommend making the crust the night before and refrigerate. Then simply mix up your quiche, pour it in and bake. If you want you could switch out this crust for my pie crust or you can simply let the quiche cool for 15-20 min or eat cold with a salad at lunch time.
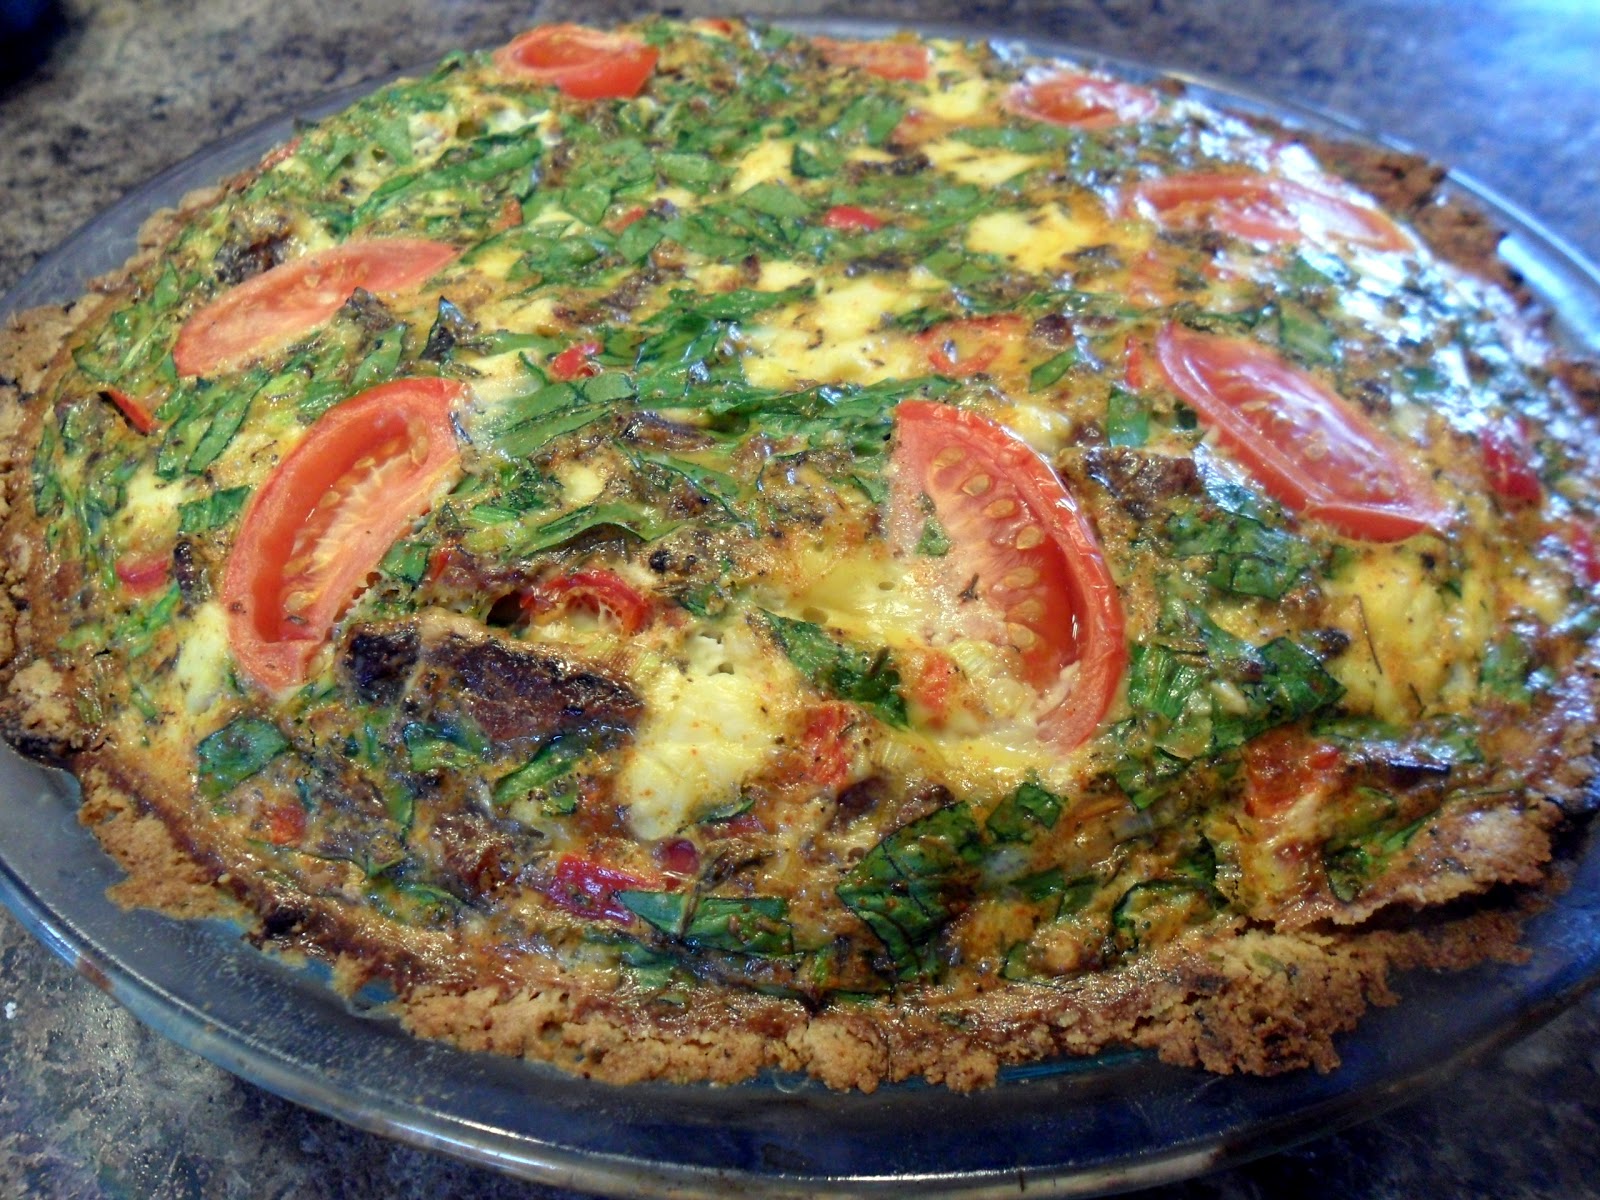
The best part about a quiche is you can really use up a bunch of vegetable that are just hanging out in your fridge. I used our last garden tomato on the top of this one!
For the most part, the vegetables will float so you can be creative with the colors of what you throw in.
When I was making the crust I was really just throwing in a bunch of deliciousness into a bowl and tossing it together. I have made this twice now. Same crust different veggies. Perfect every time.
The crust is a press in. You will need to use your hands and press it in. It's your choice if you want to go up the side of the pie plate or not. You can do a thicker crust just on the bottom or a thin one up the sides as well.
I love the crispy savory texture of the crust so I always put it up the sides so every bite is delicious. Feel free to use any other spices or herbs you deem fit in the same ratio. You can also double the recipe for a lasagna pan size casserole, versus a quiche. This fed us most of the week for breakfast. Just fry a crisp piece of bacon and served the quiche hot from the toaster oven with coffee.
Savory Herb Quiche - Grain free, Gluten free
For the Crust:
In a small saute pan:
Brown 1/2 C diced red onion with 1T butter until tender and soft. Set aside.
In a small mixing bowl:
1 1/2 C blanched almond flour
2 T chopped fresh Parsley
1 T dried italian herbs or 2tsp each dried oregano and basil
1/4 t Herbamere, sesame sea salt blend, sea salt, or kelp seasoning
1/4 t garlic powder
1/4 t onion powder
dash smoked paprika
Stir together. Add in the sauteed onions.
Melt 1/3 C coconut oil, or butter and pour into mixing bowl. Toss ingredients together until wet and crumbly. Scoop the crust into a greased pie plate and press with hands on the bottom and up the sides. Approx. 1/4 inch thick.
Place in the refrigerator until firm. 10-15 min.
For the Quiche:
In a large mixing bowl:
1/2 C diced baby spinach or brocolli
1/4 C chopped red pepper or mushrooms
4 pc bacon cooked and crumbled or 1/4 C diced ham
1/4 C cream cheese, goat cheese, or grated cheese of choice
1/4 C heavy cream, half and half, or coconut milk
5 lrg Organic eggs
1 T thyme
Dash cayenne pepper
1/4 t smoked paprika
1/4 t garlic powder
1/4 t black pepper
1/8 t Herbamere, or sea salt
Mix very well until combined. Pour into the firm and cool crust. On the top place
1 tomato cut into 8 wedges.
Bake in the oven at 400 for 35-40 minutes. Quiche will puff up in the oven and fall once removed. Quiche is cooked when the center is firm and not wiggly.
However, Kyle always wants eggs, and bacon :) Usually I will stick to waffles or pancakes (using both my whey powder recipes). However on Sunday, I wasn't in the mood for carbs.
I woke up a bit early so I had some extra time. I was having some fond memories of a hot warm quiche coming out of the oven as I sipped on my coffee and watched the snow pile up on the windows. Mmmm quiche. You know those little mini tarts that are served at parties? Besides those parties and Home Economics, I never really made them.
I was excited to try something new without adding a full carb load onto my day.
I wasn't sure exactly what crust I was wanting to try. traditionally a wheat pie crust would be used, or a store bought frozen tart shell.
I was thinking about how I didn't really feel like making my FABULOUS pie crust this early am. So I went with a herb almond flour crust.
This crust was very flavorful and delicious. The only downfall I could say is it doesn't hold together as well hot fresh out of the oven versus when it's cooled down or eaten cold.
You can cut it and it holds together, don't get me wrong, but it does crumble.
I think this recipe turned out delicious, but it did take longer then the average breakfast. To pick up the pace I would recommend making the crust the night before and refrigerate. Then simply mix up your quiche, pour it in and bake. If you want you could switch out this crust for my pie crust or you can simply let the quiche cool for 15-20 min or eat cold with a salad at lunch time.
The best part about a quiche is you can really use up a bunch of vegetable that are just hanging out in your fridge. I used our last garden tomato on the top of this one!
For the most part, the vegetables will float so you can be creative with the colors of what you throw in.
When I was making the crust I was really just throwing in a bunch of deliciousness into a bowl and tossing it together. I have made this twice now. Same crust different veggies. Perfect every time.
The crust is a press in. You will need to use your hands and press it in. It's your choice if you want to go up the side of the pie plate or not. You can do a thicker crust just on the bottom or a thin one up the sides as well.
I love the crispy savory texture of the crust so I always put it up the sides so every bite is delicious. Feel free to use any other spices or herbs you deem fit in the same ratio. You can also double the recipe for a lasagna pan size casserole, versus a quiche. This fed us most of the week for breakfast. Just fry a crisp piece of bacon and served the quiche hot from the toaster oven with coffee.
Savory Herb Quiche - Grain free, Gluten free
For the Crust:
In a small saute pan:
Brown 1/2 C diced red onion with 1T butter until tender and soft. Set aside.
In a small mixing bowl:
1 1/2 C blanched almond flour
2 T chopped fresh Parsley
1 T dried italian herbs or 2tsp each dried oregano and basil
1/4 t Herbamere, sesame sea salt blend, sea salt, or kelp seasoning
1/4 t garlic powder
1/4 t onion powder
dash smoked paprika
Stir together. Add in the sauteed onions.
Melt 1/3 C coconut oil, or butter and pour into mixing bowl. Toss ingredients together until wet and crumbly. Scoop the crust into a greased pie plate and press with hands on the bottom and up the sides. Approx. 1/4 inch thick.
Place in the refrigerator until firm. 10-15 min.
For the Quiche:
In a large mixing bowl:
1/2 C diced baby spinach or brocolli
1/4 C chopped red pepper or mushrooms
4 pc bacon cooked and crumbled or 1/4 C diced ham
1/4 C cream cheese, goat cheese, or grated cheese of choice
1/4 C heavy cream, half and half, or coconut milk
5 lrg Organic eggs
1 T thyme
Dash cayenne pepper
1/4 t smoked paprika
1/4 t garlic powder
1/4 t black pepper
1/8 t Herbamere, or sea salt
Mix very well until combined. Pour into the firm and cool crust. On the top place
1 tomato cut into 8 wedges.
Bake in the oven at 400 for 35-40 minutes. Quiche will puff up in the oven and fall once removed. Quiche is cooked when the center is firm and not wiggly.
Subscribe to:
Posts (Atom)